It has come to my attention -- after mentioning in a recent post that my manis last a week -- that this information shocked many of you. I thought that how long everyone's lasted, but I guess I was wrong. As with so much else on this blog: I'm thrilled to share my secrets with you!
Long ago I worked in a hair and nail salon downtown and learned a lot of tips from both the nail tech and hair stylists. In fact, even now my new hair stylist calls me an "advanced client" because I need so little explanation on everything.
So now here are the steps I take, good, bad and ugly. I hope your nails will look shiny and gorgeous for a WHOLE WEEK!
My arsenal of tools
* Cotton balls to remove old polish
* "Jug" of Nail polish remover from Sally's (it's cheap and works really well)
* Orange buffer and black Beauty Secrets File from Sally's
* Small blue bottle of cuticle softener (the bottle is old but has a pointed tip; I just keep refilling it with a cheap bottle of cuticle remover from Sally's
* Serious Cuticle cutters and metal cuticle pusher (spend the extra 10 bucks and you will have great ones for years! SO worth it)
* Economy size base coat, again from Sally's
* My secret weapon Essie Good to Go (the best 10 bucks you will ever spend as far as quick-dry top coats go.)
Yep, it starts off ugly. My nails peel just like anyone's! I just removed my blue polish and it's still in the cracks but that's ok.
My hair grows at a snail's pace, but my nails grow like a Chia pet! I start by cutting them with toenail clippers each week. They make a straighter line than the small clippers do.
Then I go at them with my favorite straight edge nail file that you can get at Sally's
Then I go around each cuticle with some cuticle softener/remover. I leave this on for about a minute or more. It starts to get drippy fast so I don't use too much.
Then I begin the cuticle pushing/gunk scraping. Sexy huh? This creates a smooth base for the most crucial part in the polish application in my opinion -- the bottom of the nail. If there is too much cuticle you end up with messy polish that bleeds.
Then it's time to scrub the gunk off. Just keeps getting sexier, I know. I use a cheap little nail brush that I actually got in a little set from a student of mine for Christmas a few years back.
Then I go around now that the cuticles are soft from the washing and clip away any excess bits of dead skin.
Then I take my buffing cube and buff the the tips and tops of each nail.
I especially focus on the area closest to the cuticle where the nail is fresh.
After this I give my hands another washing to get rid of all the powdery nail shavings.
After that I apply a layer of base coat, which acts like glue for your nail and the polish.
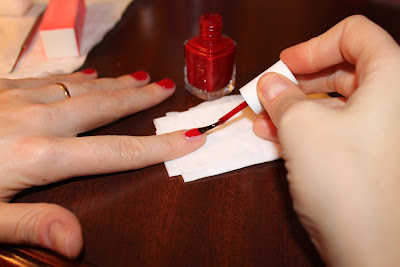
I apply the polish with one stripe straight down the middle...
...Then curve one stroke around each side. This is the trickiest of them all, especially when you're painting your dominant hand.
After applying 2 coats of nail color, I add my magical quick-drying super shiny top coat, Essie Good to Go. And then in about 5 minutes it's all dry! That stuff is incredible!
And just in case you were wondering how I store all this, here is the shelf in our linen cabinet with colors organized by hue. My husband even got me some of those tap lights so I can see in the way back!
Overall I'd say this whole process takes me about 30 minutes.
That's it ladies! I hope that helps you save some money on salon manicures. Good luck and remember practice makes perfect. Any questions, leave 'em in the comments. I'd be happy to help!


